Tuesday 8 February 2011

Bitmapping and creating a leaf.

The next part of the bitmapping tutorial was to create our own leaf. I took an image of a leaf that was already provided for us and opened it up in Photoshop and do a little bit of editing which was explained in a word file to help us out.

I then created a plane in AutoDesk and bitmapped the orginal leaf image, I then went on to the Maps section and selected Opacity and bitmapped the second leaf image. This is so there would not be any background on the plane and it will be just the leaf.

I then went on to editing the leaf by editing the vertex and the rotation tool to make it look more realistic. Once I had finished the first leaf, I decided to add another and a couple of twigs for the leaves to be attached to.


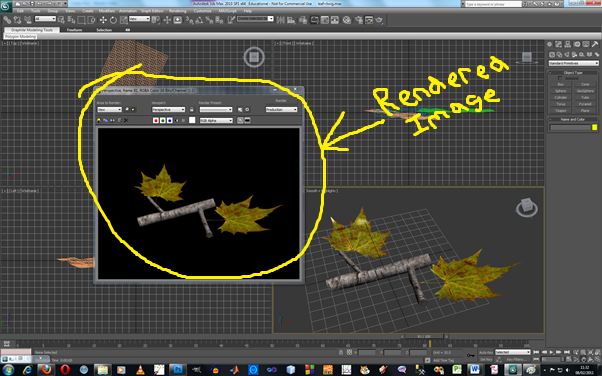
I also rendered the image at the end to see what it looked like after I had finished in a better quality.

Bitmapping

Here I learnt how to put a bitmap on to an object and how to use material textures. I have made a box and found a wooden texture from the internet. I have also learnt how to make the quality of the texture look better. This was done by going to the Maps section under the Material Editor, I then went to Bump and selected the same texture that was being used already and selected it as a bitmap.

Chess Piece

Making an Apple

Monday 7 February 2011

Tuesday 25 January 2011

Print Screen of First Tutorial

A Brief Opinion On The Brief

I think that the assignments for the 3D Modelling & Animation module sound really interesting to do. While practicing on Autodesk 3D Max, I found it confusing and complicated but at the same time it was interesting and fun to use.

As for the assignment, I think that the 30 second animated trailer of a James Bond  sounds like a good topic to do for this module and for the research I can just watch some Bond films.